Friday, June 29, 2018

Throw Some Styling Shade This Summer

     If you're going to throw some shade this summer, make sure it's stylish. Kidding. But in all seriousness, you need some sunglasses to block out harmful rays.


Throw Some Styling Shade This Summer

    It's summer. That means the sun is at it's strongest. I learned the hard way that you not only have to protect your skin from the sun's harmful rays. I sunburned my eyeballs last year. I really didn't even know it was possible until it happened. And let me tell you, it's not fun. (It feels like glass in your eyes!)

Beans throwing some shade ;)


    So you definitely want to make sure that you always have a pair of sunnies handy. I happen to love these ones from AOOFFIV. It comes with two pair, so you can either share, or keep a pair in your purse, and a pair in the car.


Block Out Those Harmful Rays

    These shades are UV400 which means that they do an amazing job at blocking out the UV rays from the sun. They feature a coat of double UV blocking to ensure that your peepers are safe from UVA and UVB rays. 


Stylish Too!

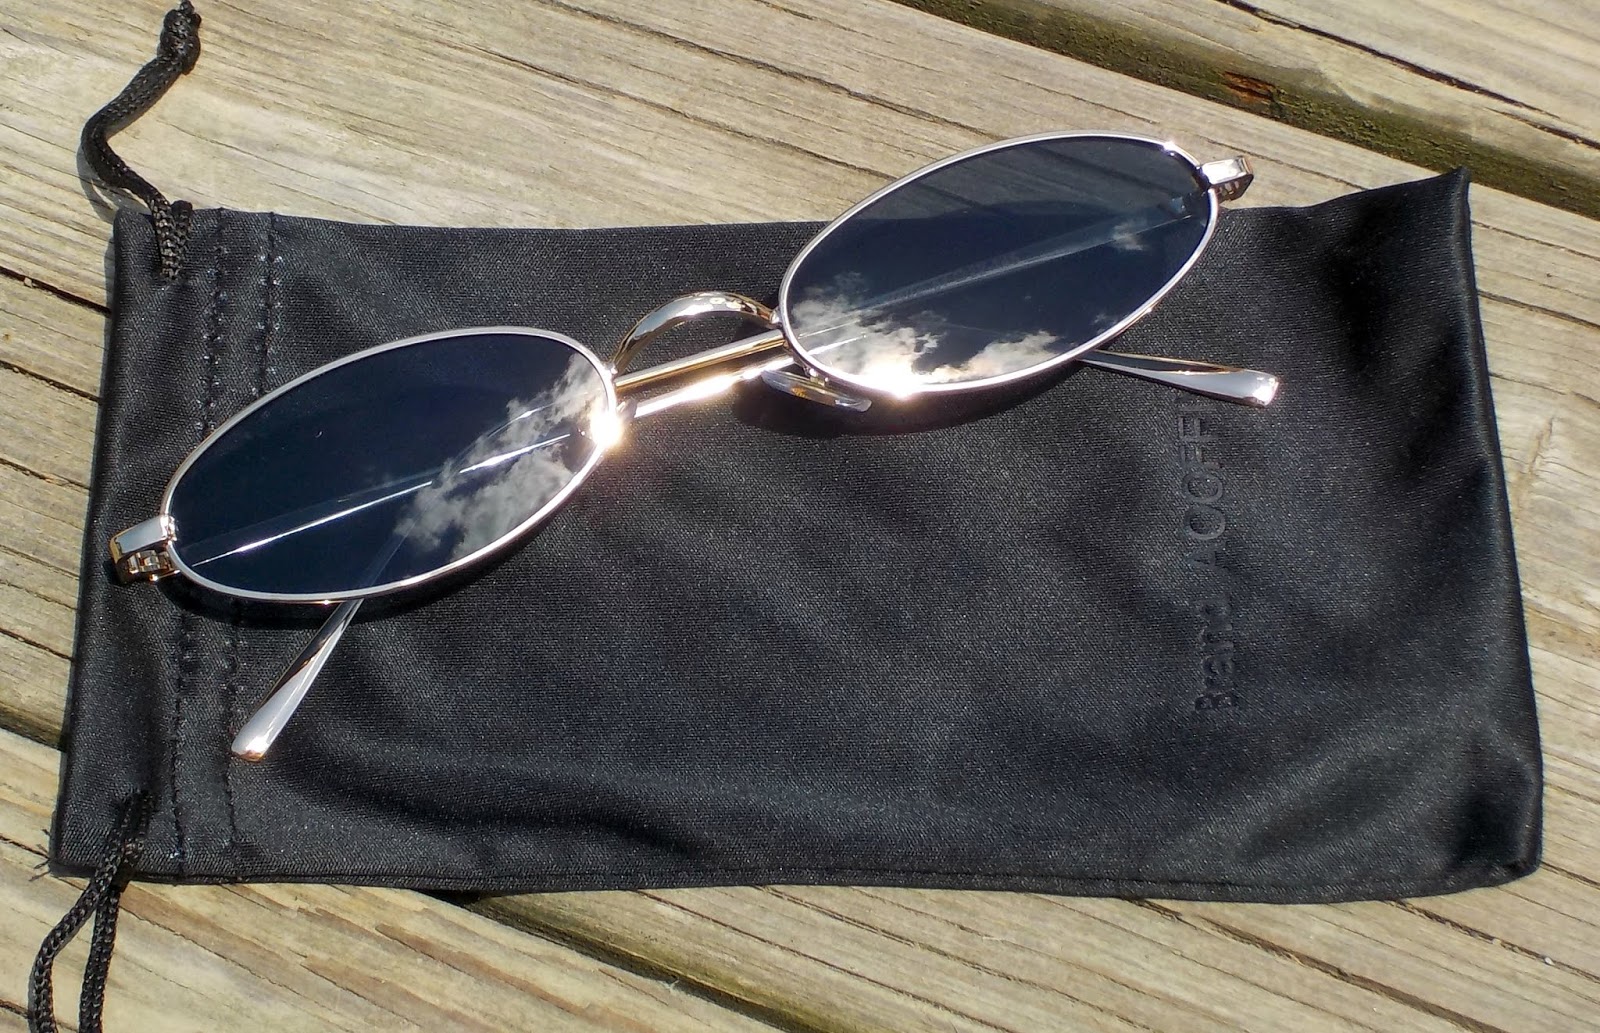
    Not only do these sunglasses from AOOFFIV protect your eyes, but they look awesome too! They have a gorgeous vintage feel to them. The metal frames are lightweight, yet sturdy. The lenses are oval and come in a wide variety of colors. I chose the set with a pair of red lenses and traditional gray ones, because Liam's favorite color just happens to be red. 


    You can buy these sunnies separately, in pairs of two, or even in threes. They come in either gold or silver metal. For lens colors they have gray, red, pink, and even yellow. 


Thursday, June 28, 2018

Support Your Knee and Enjoy the Summer

    My poor husband! He's been getting steroid shots in his back to help with pain, and now his knee is acting up. I just got him a new brace from Sleeve Stars. Now he can support his sore knee and enjoy the summer. Seeing him happy, makes me happy.


Support Your Knee and Enjoy the Summer 

    If you're looking for a quality knee brace at a super affordable price, then look no further than Sleeve Stars. This isn't our first product from them, and we have come to trust their products. I just got my husband their knee support brace. He's been having a lot of pain lately, and I didn't want him to spend another summer on the sidelines. 


Neoprene Compression Stabilizer

    This brace is made from comfortable neoprene. The fabric is moisture wicking as well so you won't have to worry about getting all sweaty while wearing the brace. It compresses the area while also giving your knee the support that it needs. Perfect for arthritis pain, strains and sprains, patella tracking, tendinitis, meniscus tear, and so much more. 


Perfect for:

  • Arthritis
  • Meniscus Tear
  • Mcl, Lcl, Acl
  • Patella tracking
  • Tendinitis
  • Osteoarthritis
  • chondromalacia
  • Jumpers knee

Fits Left and Right Knees

    This Sleeve Stars Knee Brace works well on BOTH the left and right knee. So unless both knees both you, you only need one brace. It attaches with two adjustable straps. So it's one size fits most, and won't slip and slide like many other knee braces. 

    You can wear this brace under or over clothing too. Whichever way is more comfortable for you. Rest easy knowing your knee is protected, and it will help alleviate your pain.


Some More Details

  • Provides support to minimize pain during workouts.
  • Helps you accelerate the recovery process. 
  • Eases pain in the Knee area.
  • Fits knees between 12.5 - 18 inches. Easy to adjust for best fit. Unisex model.


Stay Cool Wherever You Go

    Here comes the heat wave! At least here in NEPA. They're calling for 100° or higher. Thanks to my new little desk fan from Trustech, I will be keeping cooler.


Stay Cool Wherever You Go

    Even with the air conditioners running, I still get hot flashes. (Thanks so much Mother Nature!) So I was looking for a smaller fan. One I could use on my end table, but one that wouldn't take up a ton of room. I stumbled across the Trustech USB Desk Fan. It's perfect!

    It's small in size, but mighty in power, and really helps me through those dreaded hot flashes. Because it runs off of a USB cord, you can plug it into your computer, laptop, and more. This is super handy because that means you can use it at work. You could take it camping as well.


Sturdy Design

    The Trustech USB Desk Fan is sturdy in design. Both the frame, and the fan blades are made of lightweight metal. So you don't have to worry about it becoming dented or cracking. This fan only weighs fourteen ounces, so it's lightweight and easily goes wherever you do. 

360° Cooling

    You can position your Trustech USB Desk Fan a full 360° for optimal cooling. You can set it on any flat surface, or you can even hang it over something thanks to base. And don't worry that the metal will scratch up your surfaces. It comes with rubber covers to place on the bottom to save your table tops.


Power Saving

    The Trustech USB Desk Fan only uses five watts of power per hour. So you don't have to worry about it running up your electric bill. It also has an on and off switch so you don't have to unplug it to turn it off.


Wednesday, June 27, 2018

Add Some Beauty to Your Wall


    Tired of drab walls? Why not add some beauty to them with a tapestry? It's an inexpensive and easy way to spice up any area.


Add Some Beauty to Your Wall

    A quick and simple way to spice up any wall in your home is a tapestry. I just got my sister and brother in law this gorgeous Psychedelic Forest one as a housewarming gift. They're theme is a lodge with all sorts of animals, so this one was absolutely perfect! 

    The background looks like colored barn boards. Then it has gorgeous shadow like images of giant forest trees and elk. My brother in law loves bucks with big racks, so I knew he was going to love this.


Perfect Addition to a Boring Dorm Room

    Sending a kid off to college? This tapestry would be a great way to decorate a boring wall in their room. They can quickly and easily add a touch of themselves to their dorm room. Making it look and feel more homey. 

More Than a Wall Hanging

    What I love about tapestries is they are more than just a wall hanging. You can use them as a picnic blanket. Or even at the beach. I personally have a tapestry that I use as our family beach blanket. Not only does it look nice, but it's easier for me to spot where we're at when I drift away while body surfing.


Large and Soft

    This Psychedelic Forest tapestry is a great size. It measures fifty-one inches by fifty-nine inches. It's made from a soft and comfortable one hundred percent polyester fabric. It can be machine washed too. If you use it for a beach blanket, you can easily shake sand off of it to pack away when it's time to leave.


Binge Watch Your Favorite Shows Anywhere


    I binge a bit of tv every night in bed. I use my phone since my tv isn't a smart television. However, my hand gets tired, or my neck gets cramped trying to see it while my phone sits on my bed sight table. Now we can all binge watch tv anywhere!


Binge Watch Your Favorite Shows Anywhere

    Thanks to the FUTESJ Gooseneck Tablet stand, you can binge television of your device comfortably. This stand is universal and will hold tablets from 10.5 inches, as well as most smartphones. It works with Samsung S6, S7, S8, the Note and many more. The stand also holds iPhone 5s, 6s, 7, 8 and X too.


    The bracket slides up to accommodate each device. It the clips to any table, desk, or nightstand so you can watch tv. Since it's a gooseneck, you can adjust it so you can easily view your device. The ball knob also give you 360° rotation so you can manipulate it where you need it.


    It even has openings in the bracket for charging your device. You can access your headphone port as well through the openings.


Sturdy

    The FUTESJ Gooseneck Tablet Stand is made from sturdy magnesium alloy. This assures you that it will stand up to everyday use. Because it's adjustable and bendable, you can fit it in any bag, and don't have to worry that it can't take being manipulated.


I Love It!

    Since I received my FUTESJ Gooseneck Tablet Stand I have been able to enjoy my favorite shows in bed. I attached mine right to my nightstand, and I just clip my phone in. It's so handy and it saves my hand and neck from becoming cramped. 


Tuesday, June 26, 2018

Self Employed and Looking for a Loan?

    If you're self employed, you may find it difficult to locate a lending company to help. But don't worry, we're here to help!


Self Employed Loans?

    Whether you're looking to buy a home, investment property, or to consolidate some debt, if you need a Self Employed Loan, you may be having a hard time. When you don't have W2's to submit, many loan companies may turn you away. However, The Associates Home Loans of Florida Inc. would love to be of assistance to you.

    They are professionally helping people just like you and me get their dream home, fix up their dream home, or even pay down some debt that may have accumulated. 

Bad Credit?

    My generation didn't a clue of bad credit. Nowadays you see commercials numerous times per day about taking care of your credit score. Those weren't around when I was younger. Now, as an almost (GASP) forty year old, my husband and I have been working on taking much better care of our credit score.

    However, to do that, we needed to find a finance company that would work for us. The problem is, many will check your credit, and when they do, it goes against you. If you get turned down, you're not only disappointed, but now the credit score you're working so hard to improve gets lower. 

    The Associates Home Loan of Florida Inc. is here to help you. Bad credit or not. So don't let your score hold you back. Contact them and see how they can help.


Pull Your Credit for FREE!

    If you don't know your credit score, don't worry. Through The Associates Home Loan of Florida Inc., you can pull your credit score for free. And guess what? Because they do it through Merdian, the pull is not just free, but it doesn't affect your credit score either. You can't beat that!

Loan Options

    With so many loan options, you're sure to find everything you need from The Associates Home Loan of Florida Inc. They have FHA loans, Home Equity, Hard Money Loans, Reverse Mortgage, VA loans, and so much more. 


What Sets Them Apart

    So what sets The Associates Home Loan of Florida Inc. apart? A few things actually. They deliver reliable and accurate results with just a quick, thirty second form. They don't require a social security number up front, or a credit check. Which is great if you're like us, and nursing your score back to health. 

    The Associates Home Loan of Florida Inc. will keep your information private. That means you don't have to worry about it being sold to a third party company. Their no hassle information means you can have a consultation without obligation.

Accredited

    You can trust The Associates Home Loan of Florida Inc. They have an A+ rating from the Better Business Bureau. They're also part of the National Association of Mortgage Brokers, Florida Association of Mortgage Professionals. Oh, and I can't forget that they're an Equal Housing Opportunity Lender, which means they're insured by the Federal Deposit Insurance Corporation (FDIC.)


No One Wants Warm Beer in the Summer


   On a super hot day, an ice cold beer can be so refreshing. However, summer heat can quickly turn that icy cold beverage into a nasty warm or even steamy one. No one wants that. Which is where Asobu comes in.


No One Wants Warm Beer in the Summer

    The days are getting longer and hotter. That means more time for a nice frosty cold one. ;) I don't know about you, but unless my beer (or any beverage for that matter) is cold, I can't drink it. This is why I was so excited when I stumbled upon the Asobu Frosty Beer 2 Go bottle. It's so handy! Not only will it keep your canned drinks ice cold, but it works with bottles too. 


Cold for Hours!

    The Asobu Frosty Beer 2 Go holder keeps beverages cold for HOURS! Your drink will be cold from start to finish. I promise! The holder is made from stainless steel and is vacuum sealed to keep it insulated. It's also sweatproof too, so it won't leave rings on any furniture.


Handy and Awesome!

    I have a few different holders for drinks, and this one is my husband's favorite. He loves that he can go from drinking a cold can of pop, and then switch to a bottle of beer, and both will fit in the Asobu Frosty Beer 2 Go holder.


    The holder is actually in four pieces. You have the base that holds the can or bottle. One top goes on top of a can, and seals it so soda or beer doesn't leak out when you drink. If you're using a bottle, then place the bottle top on top of that. Last but not least, there's a rubber lid. This works as two things. First of all, it has a bottle opener built in. So no need to worry if you forgot one at home. Secondly, you can place it over the top of your bottle to keep flies and bugs out. For me this is huge. Bugs are everywhere in the summer, and if you'd ever accidentally drank one, you know how gross that is. 


Three Colors to Choose From

    You can get the Asobu Frosty Beer 2 Go in three colors. They have a sleek all black version as well as a copper one, and stainless steel silver one. All three are nice, and my hubby already has the other two colors on his Amazon wish list.


Monday, June 25, 2018

Water Balloons Just Got an Upgrade

     Water balloons are great summer fun. However, they're messy, and really not great for the planet. But that's okay, because these water balloons just got an upgrade. They're quick and easy to make, and your kids are going to love them.


Water Balloons Just Got an Upgrade

    I've been wanting to crochet for years. As a kid, my great gran and gram taught us to make chains, but that was all I could ever do. This past March I finally decided it was time to learn. So for my birthday I got some hooks and a few skeins of yarn, turned to YouTube, and I've been "hooking" ever since. 

    A few days ago I discovered a tutorial for reusable water balloons. I was immediately hooked. Think about it. No filling balloons, no little pieces of breakage, and a fun project to crochet. I immediately went through my yarn stash and got started.


Why Crochet Water Balloons?

    I don't know about you, but I've long been discouraging my son from playing with water balloons. First of all, it takes me an hour to fill them, and takes the kids about five to ten minutes to break them all. That's not cool. Secondly, they leave little piece all over the yard. That's not good for our fur babies, our Earth. The kids never want to pick them up, and I sure as heck don't want to. Third, these reusable water balloons are so much better for our planet. So this tutorial is a win win.


How Do They Work?

    It's simple really. Get a bucket or two of water. (You can use them in the pool, the lake, or even the creek like us!) Place the crochet balloons in the bucket(s) and press them down in. Get them good and soaked. Now step back and let the kids have a blast. That's it! 


    When they're done, wring them out and hang to dry. You can wash and dry them in your machines too. Which makes them perfect for families. They would make a fantastic gift too! These balloons would be a wonderful way for kids to work on fine motor skills, while having fun at the same time! I love play therapy!

I'm Hooked, Let's Make Some

    I know by now you're just as hooked on this idea as I am. So grab your 9mm crochet hook, and some Bernat Blanket Yarn. This is key for a few reasons. It holds more water. They suck up the water, but don't retain it in their fibers. They also crochet up quickly. I made six for this post in just over an hour. 

    I only made six, because I used the Bernat Blanket Yarn I had on hand. However, we're headed to Walmart this week, and I will purchasing some bright and fun colors to make more. Now that I have you hooked on this amazing idea, here's the YouTube video by Left in Knots, that started it all! Enjoy! If you make some, come back and share some pics!


Saturday, June 23, 2018

Pork and Beet Pup Cookies

    Yes, you read that right, pork and beets. Not beans! We don't want to encourage our four legged family members to fart! ;) Using leftovers, and a few ingredients from my cupboard, I just whipped up a delectable batch of cookies for my pups.


Pork and Beet Pup Cookies

    At some point, "everypawdy" has left overs. If I don't give them to my girls for dinner, I use them in some sort of baked goods. I love creating one of a kind treats for my girls because they're healthier for them, and I know what's in them. If you're like me and want to give your fur children the best, then read on for our newest recipe. It's "supaw" easy and your canine companions will love them.

Here's What You Need

  • Pork, or even leftover ham will do. (I tend to go for pork because it has less salt content. (You're going to want to grind it up in your food processor, and will need 1 cup.)
  • Beets (I use canned. Again, I break them up in my food processor and when done, you will need 1/3 of a cup.)
  • 1 cup of flour
  • 1/3 cup of honey (my girls and I love wildflower honey.)
  • 1/3 cup of granola or oats
  • 1/3 cups of oil (I use Coconut oil because it's beneficial for their skin and coats.)
Top left: Ground Pork
Top Right: Ground Beets
Bottom Left: All Ingredients
Bottom Right: How you want your dough to look

Let's Get Baking!

    Preheat your oven to 350°, and then prepare all of your ingredients. In a large bowl combine the ground pork, beets, flour, honey, oil, and granola (oats.) Mix well. You want it to stick together. If you feel it isn't sticking together enough, add in a bit more of the coconut oil. 

    Grease your cookie sheet, and then roll the dough in your hands. I make mine about the size of a nickel. Then I flatten them a bit on the tray. When you're done they should be between a quarter and fifty cent piece in size. Bake these bad boys for about fifteen minutes.


    Let them cool, and give your fur baby a taste. I promise you, they are going to love them! I freeze mine so they last longer. Since these cookies are all natural without preservatives, they can be kept in the fridge for about two weeks. To keep them longer, you will have to freeze them. I wouldn't recommend keeping them on the counter or in your cupboards as they can get moldy in a few days, due to the lack of preservatives. 

Puptastic Crunchy Granola Bites

    If you follow me on our page, or know me personally, you know how much I love to cook and bake for my fur girls. I recently created them some puptastic crunchy granola bars. They're all natural, and so good, you will want to eat them too. (You could eat them since they're made with stuff we eat.)


Puptastic Crunchy Granola Bites 

    When I'm baking for my girls, I try to make them crunchy treats. It helps to keep their teeth clean. Bayleigh lets me brush her teeth, but Josie wants no part of it. I worry about her little teeth getting too much tartar on them, so to compensate, I try to give them crunchy treats. These are perfect. Not only do they taste amazing (yes, I ate one,) but they're super crispy too. So let's get started.


What You Need

  • 3 Cups of Oats
  • 1 Cup of Nuts or Granola Chunks (I used Bob's Red Mills Granola chunks because that's what I had on hand.)
  • 1/4 Cup of Oil (You can use coconut or vegetable)
  • 3/4 cup packed brown sugar
  • 1/2 tbsp vanilla (You can omit this. I did.)
  • 1 tsp Cinnamon (This is great for their breath too!)
  • 1/2 tsp salt
  • 1/4 cup of Honey (We love Bee Harmony Wildflower Honey.)
  • Bar Pan and Parchment Paper or Silicone Pan

Time to Get Baking! 

    Preheat your oven to 375°. In a large mixing bowl combine your OATS, OIL, and SALT. Mix well, and pour into a pan. A bar pan would be perfect, but if you don't have one, you can use a 13 x 9 cake pan. Put this into the oven to bake for about 25 minutes. However, you need to stir them every ten minutes so they bake evenly.


    Remove your oats and decrease your oven temperature to 300°.  In your large mixing bowl pour your baked oats. Then add in nuts or granola, oil, brown sugar, vanilla, cinnamon, salt, and honey. Mix it well. 

The Pan

    If you have a bar pan handy, line it with parchment paper, and spread your granola mixture evenly through the pan. Using a spatula, pack it down tightly. Bake it at 300°for 30-40 minutes. Check it at 30 minutes because no one wants burnt granola. 

    Once they are baked, remove the pan from the oven. Let cool about ten to fifteen minutes, then cut them. Don't wait much longer because the cooler they get, the crunchier they get! That's it! You can store these covered for about two weeks.


Don't Have a Bar Pan? No Problem!

    I gave my bar pan away a few years ago. (DOH!) But I do have this handy dandy silicone pan that has a bunch of small squares in it. I spooned my granola into the squares, and packed them tight. Bake it following the same instructions, EXCEPT ONLY BAKE FOR 15-20 MINUTES.  Remove, and let the squares cool. I put mine in the fridge for about fifteen minutes. Then I just popped the treats out. (This recipe yielded about 3 dozen Crunchy Granola Bites.) I popped two dozen in the freezer, and put the other dozen in my girls treat jar.


    They LOVE them! However, due to the brown sugar, and the added sweetness of the honey, don't over feed your pet. Just like anything, feed in moderation. I give my girls one per day. They're waiting every morning as I make my coffee. So they have a tasty treat while I nurse my eyes open with caffeine.

Devil's Food Peanut Butter Volcano Cake

    Father's day weekend, I stumbled into a really cool recipe that I want to share with you. Because I always make things "my way," and put my own spin on them, I'm sometimes surprised when they turn out so well. If you love chocolate and peanut butter, then you're going to love this Volcano Cake. Let's get started!

Nom Nom Nom :D

Devil's Food Peanut Butter Volcano Cake

    I recently got a Nordic Ware Bundt Pan, and I've been all about making new and tasty desserts in it. The week prior to Father's day, I made a simple chocolate cake with peanut butter glaze, but I wanted to spice it up. So here's what I came up with. It's easy, and so good. You're family is going to love it. That is, if you decide to share it. ;)


Here's What You're Going to Need

  • Bundt Pan (This is a must and gives your cake a volcano type feel.)
  • Devil's Food Mix (Just because this dessert rich and decadent, doesn't mean it has to be difficult.)
  • Any ingredients listed on your cake mix
  • Peanut Butter (1/2 cup for Lava Glaze. 1 cup for cake.)
  • Milk 1/3 cup
  • Confectioner's Sugar 1 cup
  • Salt (Gives lava glaze more pb flavor. I only use a pinch or two.)
  • Water (about 1/4 cup)
  • Mini Reese Cups

The Cake

    Prepare your Devil's Food cake according to the directions on your box. Be sure to grease your Bundt pan thoroughly, so your cake will release with ease. In your microwave, melt down a cup of peanut butter. Pour this into your bundt pan over your cake mix. Then swirl it into the batter with a knife. Bake your cake, and let it cool. 


    If you want to save some time later, go ahead and cut your mini Reese Cups into fourths, and set aside. (If it's a hot summer day where you live, put them in the fridge.) Once your Bundt Cake is cooled, pop it out of the pan and onto a serving plate.


The Lava Glaze

    Here's the part that makes your cake seem like a Volcano. I stumbled on this accidentally (let's call it "snaccidentally since cake is a snack!) As I was preparing my traditional Peanut Butter Glaze. I normally melt my peanut butter in the microwave, but this time, I decided to try it on the stove. In my smallest saucepan I added my peanut butter, pinch of salt, and milk. As I whisked it, and it cooked down, I got a really thick glaze. So I added about a quarter cup of water. I whisked it more, and added a cup of confectioner's sugar. If it's still too watery, go ahead and add more sugar by eye. You want it runny, but not too much. 


    Now comes the fun part. Pour your "lava" over the cake. I used a ladle to make sure it ran all down my sides. Put the remaining lava in the center of the cake. Then just sprinkle your cut up Reese Cups all over the "volcano." That's it. You just turned an ordinary box cake mix into a rich and decadent dessert. So grab some forks and plates, and enjoy!


NOTE: I refrigerated our Volcano Cake because it was 95 degrees the day I made it. So our "lava" didn't flow a lot. If you want more flowing lava, don't refrigerate, or use water to think your glaze.)